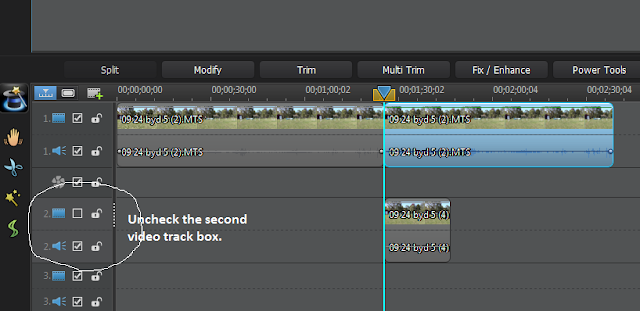
I use PowerDirector 10, but the general techniques should be applicable to any software editing software that provides two or more tracks for video. First prepare your video as you normally would in the first track. Load the clip you want to compare in the second track.
In the screen shot above, I have selected the clip in the top track to work with first. In order to make it easier to see the position changes I want to make with the top clip, I deselect the second video track.
 Notice there is a plus sign within a circle on the viewing screen in the first photo. (If you can't see it, double click on the photo for a larger image.) Place your cursor on the plus sign and move the clip toward the top of the frame.
Now to work on the second clip. Check the video box so that it reappears on your editing screen, and click on the clip itself so that you can move it.
In the screen shot below, the video of the second clip is pretty much obscuring the top clip which I have already moved. Now all I have to do is place my cursor on the plus sign and drag the second track toward the bottom of the viewing screen.
And voila! You now have both video tracks visible on the same screen. Magnify the tracks and move the second clip right or left until you have a common starting point in the two clips.
If you want to add a little more work to your project, you can crop the second clip to remove some of the sky. Unfortunately, in PD10 this isn't as easy as it could be since there is no pre-set template that allows for one step horizontal cropping. (Oddly enough, there are three templates for vertical cropping.) I don't know how easy it is to crop the view in other software, so I leave that for you to explore.


